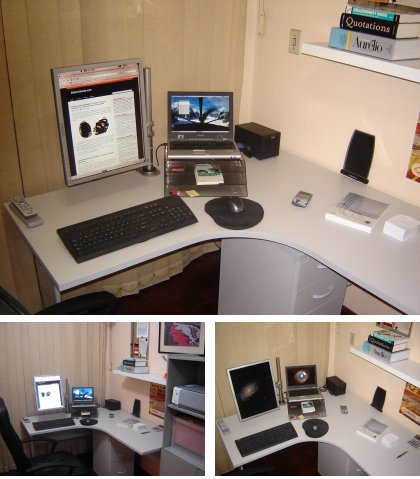
Declutter your desktop: an organizer for those cables and gadgets for less than $10
Notice to international readers: This is the English version of the article "Um organizador de cabos completo por menos de R$ 20, com uma grelha e 2 sargentos", by Augusto Campos, published by Efetividade.net.
The war against cable clutter
You can install a complete and effective cable and peripheral organizer for under US$10, with little hassle and without using adhesives or damaging the desk.
Cables and wires crawl between computers and appliances around the world. They're ugly, act as natural dust accumulators, and help build up the clutter in your office (or home). In some cases - keyboards, mice, network connections - finding wireless alternatives is already trivial. For most others, however, there's no way to avoid the need to using wires and connectors.
Last week I bought a new desk for my home office, and decided not to let the cables and small peripherals take the high ground in this battle. After a quick visit to the tools and utilities store, spending ~US$ 10 (brazilian R$ 19,40), and with an hour of light assembly work, I got a setup that pleased me enough to go along with it.

The cables and small peripherals are gone
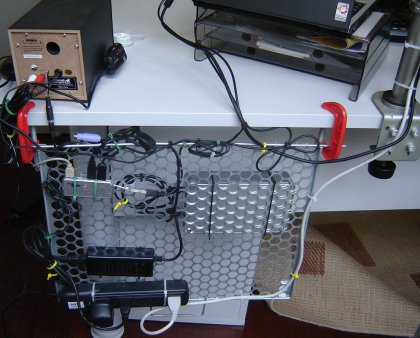
My desktop solution puts away (but near enough) the external hard drive, the USB hub, the AC adapters, the external monitor VGA cable, a power strip, most audio and USB cables, and the power cables. It offers enough free space to be upgraded to hold the wireless access point, in case I decide to move it to this side of the house.
All of this without drilling or damaging the desk, no adhesives and with no tools except the ones that are part of the setup.
My setup
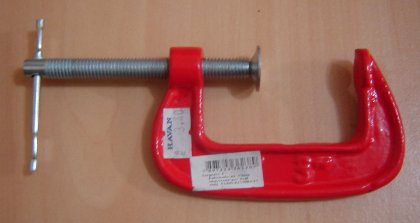
The system was mounted using a small barbecue grill suspended from the table top, behind the desk - between the desk and the wall, with some extra space added for ventilation. To allow for easy mounting and unmounting, without drilling or using screws, I used 2 G clamps, like the one pictured below.

A small G clamp
The G clamps are positioned in a way (pictured bellow) that allows for the grill to be tilted when I need to access its opposite side, and I can easily uninstall or reposition the system by opening and closing the clamps.

The clamps are positioned like this
Note that I could find places for the clamps to stay hidden behind some other desktop features. If your clamps are going to stay visible, choose their colors wisely! ;-)
I bought a very cheap barbecue grill, but one on which I could get a decent grip for the cables and peripherals using common nylon cable ties. If you plan to add or remove your cables and gadgets frequently, consider using (strong!) velcro cable ties for them.

Nylon cable ties
With this setup, I could easily tie all wires and gadgets in an organized way. Mind the heat dissipation if you consider using both sides of the grill. I used the opposite side for the external hard drive, and reserved some front side space for the wireless access point, if the need to move it arises.

Hard drive on the opposite side
Shopping list
My cable and gadget organizer was very cheap indeed. This is the parts list:
- 2 G clamps, cheap type, made in China: R$ 3.40 each, R$ 6.80 total (US$ 3.50).
- 1 barbecue grill, cheap type: R$ 9.50 (US$ 4.88)
- nylon cable ties, 100-pack: R$ 3.10 (US$ 1.59)
Total: R$ 19.40 (US$ 9.97). I don't know if you can find these items on your local hardware shop for the same prices, but it shouldn't be expensive, anyway. You can mount this setup in less than 60 minutes, and without any damage to the furniture.
That's my cable and gadget organizer, and it works for me. How about yours? Share the pictures and the story!
Comentar
Comentários arquivados